|
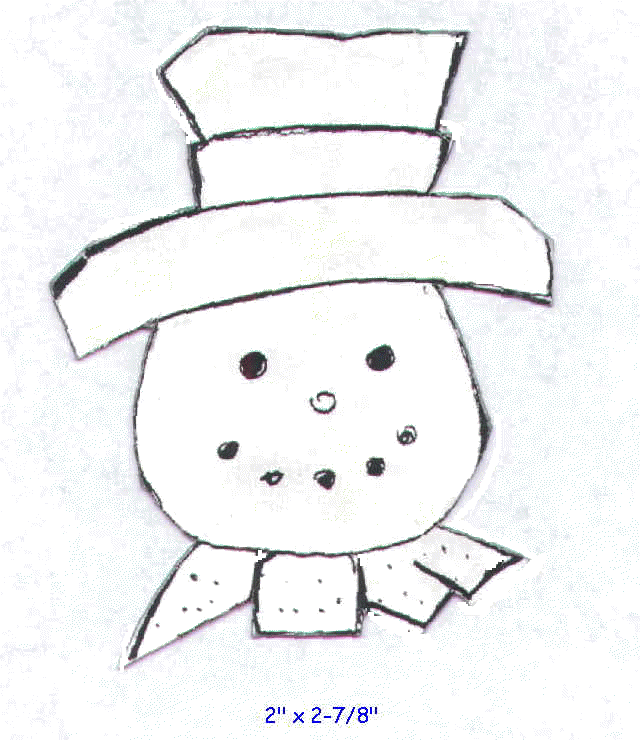
This pattern was inspired by an old Boy Scout kerchief slide pattern.
We use it as a pin or as an ornament.
The pattern also makes a great bolo.
Glue "snowballs" on the ends of the lanyard.
Adjust the size and wood thickness as desired.
:: MATERIALS · PATTERN · NOTES ::
:: Back to Patterns ::

-
MATERIALS & SUPPLIES
TOOLS -- carving
knife, pencil, saw, toothbrush
SUPPLIES --
Pin: one pinback (3/4-in min.), glue, sandpaper,
tooth pick (to dot eyes & mouth)
Ornament: one (217-1/2) brass screw eye & a 4-6"
length of 1/4" ribbon or string
Bolo: a lanyard, clip, and tips (use 1/2" balls,
painted white)
WOOD --2-1/2"
x 3" x 1/2" basswood strip & tooth pick or bamboo skewer for nose
FINISH
- Paints: white, orange, red,
black, cool color for scarf
- Brush: as per size of carving
- Sealers: fast-dry lacquer,
acrylic sealer
PATTERN
.
Click to
Enlarge Pattern
PROJECT NOTES
- Transfer the pattern to the wood.
Cut out the blank.
- Using paring cuts, remove the saw
marks on the edge of the blank.
- Round the edges of the blank.
Beware the changes in grain dynamics. If the knife cuts "chunks", reverse
the direction of the cut.
- Stop cut the bottom of the hat brim.
Cut back to separate head from the hat.
- Stop cut the top of the brim and cut
back to separate from the top of hat. Deepen this cut to at least 1/8".
- Using paring/push/pull cuts, round
off the top of hat.
- Stop cut the top of the hat band.
Cut back to separate from the hat's crown.
- Stop cut the bottom of the
"chin". Cut back to separate the head from the scarf. Deepen this
cut to at least 1/8".
- Use paring/push/pull cuts to round
the sides of the head.
- Using stop and cutbacks, separate
the scarf details. Round-up.
- Smooth and round-up as desired.
Brush the carving with the toothbrush to remove loose chips.
- OPTIONAL: if not
painting the nose, cut the tip of the skewer or tooth pick and shape. Drill a hole
to receive the nose. Fit and glue.
- Clean-up the fuzzies. Sand as
needed.
- Damp brush the carving, using a
toothbrush and soapy water. Pat dry and leave to dry.
- Spray with quick-dry lacquer to seal
the wood and let dry.
- Paint and let dry. Suggested colors
Hat = black
Hat band = red or color color (add glitter for an extra touch)
Face = white
Nose = orange
Scarf = color color of choice (add dots or stripes if desired)
Eyes/Mouth = black dots (made with tooth pick)
NOTE: Check the carver's bolo.
- Spray with acrylic sealer and let
dry.
- Apply antiquing gel if desire.
Re-seal and let dry.
- Glue pinback and let dry.
Ornament: Insert screw eye in center of the top hat. Cut and insert 4-6"
1/4" ribbon.
- Sign and date the project. It
is done !!

|
|
